Upcycling Wooden Furniture
Namaste friends,
Hope you all are doing great. Today I am sharing how I
upcycled my shoe rack using decoupage technique.
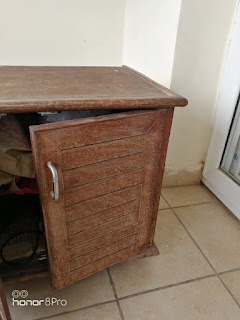
I had this wooden shoe rack which because of dust and rains got
patchy and was not looking nice. So, I decided to give it a makeover.
Firstly, if you are working with furniture then first step
is to sand it properly. If its old one then this step is more important. Sanding
removes old paint, dust and makes the surface smooth.
After sanding I have applied gesso all over. I have used Camlin
gesso.
Then I have applied directly the lemon chiffon (light yellow)
shade of chalk paint from Itsy Bitsy.
My this rack is kept in my balcony so thought to decoupage
it with flowers which can go with my plants kept around in the balcony.
To decoupage first select the design tissue and tear the
design which you want to stick. Then you have to apply decoupage glue on the
surface where you have to stick decoupage tissue. Generally the tissues are 2
ply or 3 ply. You must keep the ply having design and discard the rest of the
(white) plys. Stick the tissue on the surface and then again apply a layer of decoupage glue to seal
the tissue paper. I have removed the handles of the rack before working. THe one remaining i was unable to take out so have to work very consciously around it.
After sticking tissue just blended the corners wherever needed.
After that I have done stamping and then stenciling.
Finally, Igave 2-3 coats of varnish from itsy bitsy. You can use any other outdoor varnish also.Ffixed the handles at last.
I hope you like this makeover. Happy Crafting! If you like it then do leave some love.
Follow me on Facebook here.
Follow me on Instagram here.


Comments
Post a Comment